Inkjet tumbler for $0!

About a tablespoon but depends on how many coins you are tumbling. The stuff is cheap and I get it free quite often at Autozone. They have specials where you get hand cleaner and the blue shop towels for free with your order. I would guess that many pumice hand cleaners would work.
 
I finally dug my old HP photosmart printer out of the garage to give this project a try. The hardest part was finding a small enough torx screwdriver to take the thing apart. The whole job took about a half hour from start to finish.

I loaded up a plastic bottle with a bunch of coins, filled it about one third of the way with water, shook a little salt in it (don't ask me why... maybe for flavoring!), added some Dawn dishwashing detergent, fastened the lid tightly and let her rip!

I'm not interested in producing shiny coins, just something clean enough that will run through the coin machine. I only let it run about a half hour. Poured the mix out in the bathroom sink and rinsed off the coins. They're not shiny, but they're not grungy anymore. I'm going to try them out in the coin machine this morning.

Oh, and the OP was right... you WILL get ink on your hands! :lol:
 

Attachments

  • printer 1.jpg
    printer 1.jpg
    37.6 KB · Views: 753
  • hands.jpg
    hands.jpg
    27.9 KB · Views: 830
Wow!
Awesome thinking ! Haha
You da man! ;)
When it says "Ink Low" it probably means to change out some more clad!"
Haha

Pete
 
Hate to rehash an old thread, but this is an awesome idea too good to pass up. I'll be making one soon if I can find an old printer at the local thrift stores to tear apart. Was looking at getting a tumbler but believe this could easily substitute for A LOT cheaper!

Thanks for the ingenuity!!!
 
Okay, I apologize... but this is going to be a pic heavy disassembly and I'm stuck at the end, so I could use a lil help...

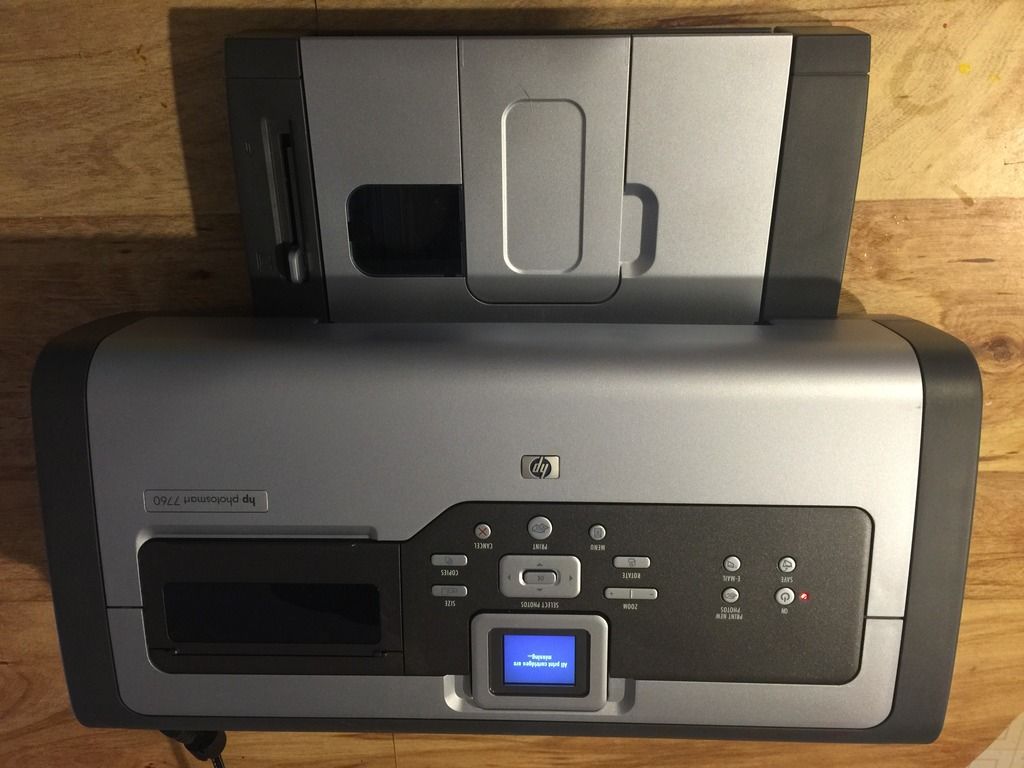
Went to local thrift store and got this for $8, brand new not in box but still had the tape and plastic screen guards on the easy scratch plastic parts and screen so good deal!!!


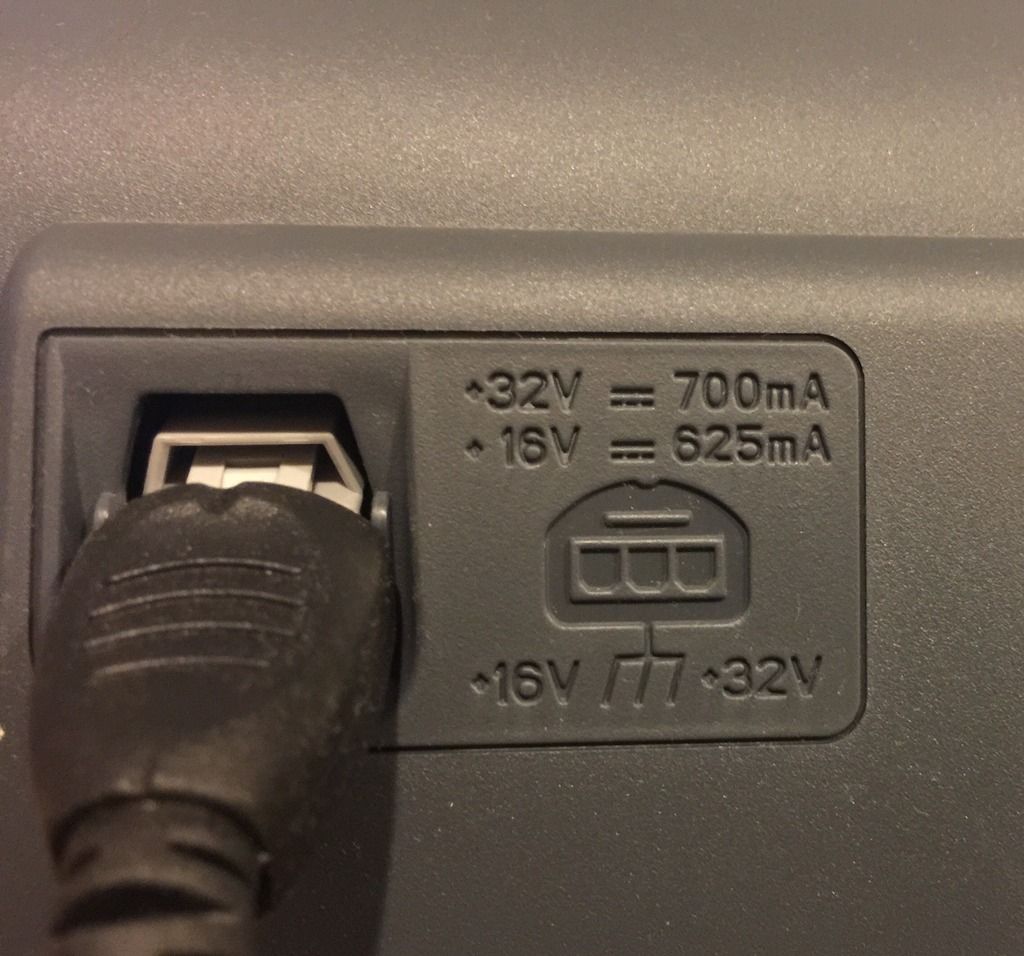
And I know what you were talking about with the 32v and 16 volt, mine says the same but the plug has a built in converter that put out 32v and 16v respectively....


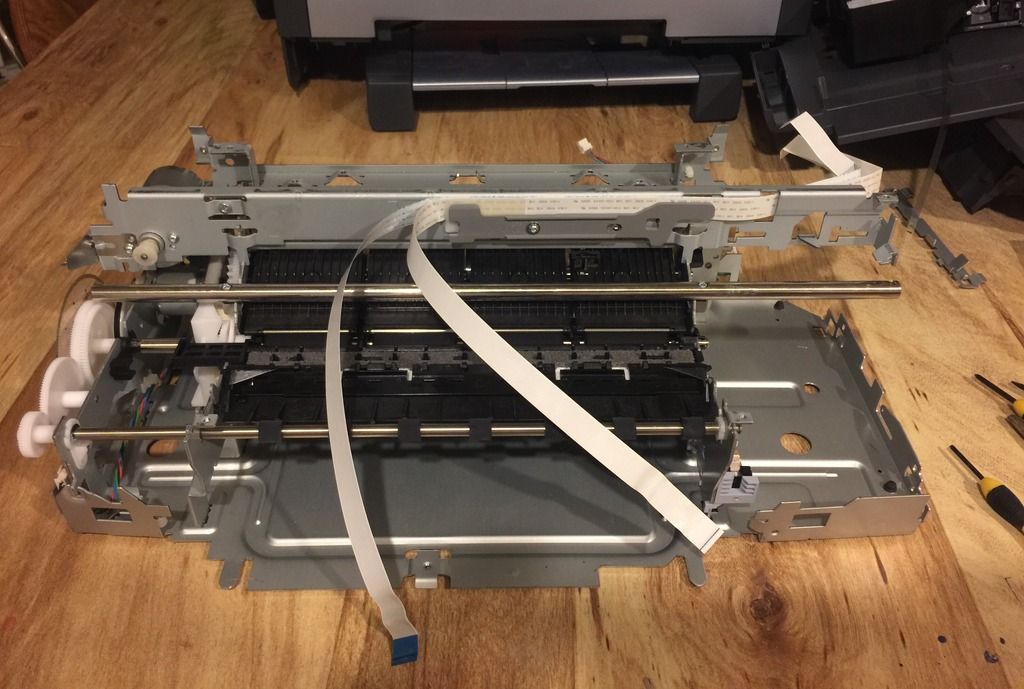
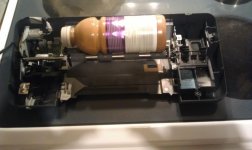
6 torx screws later and the top cover comes off with a few other pieces of the printer...


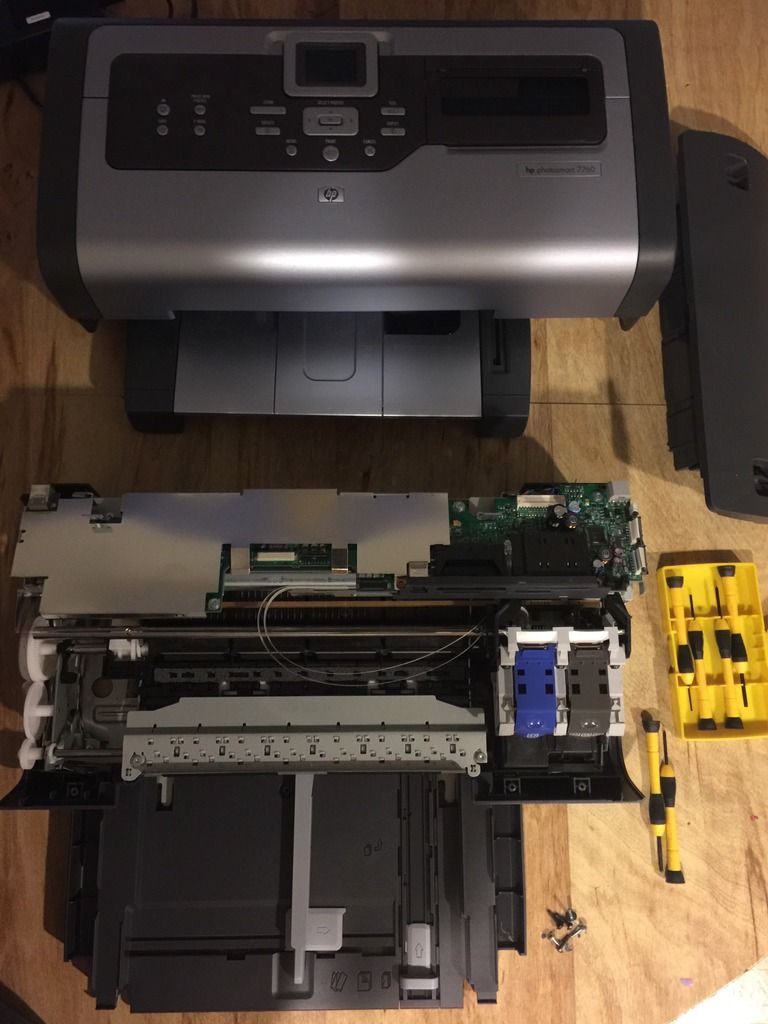
Few more screws as you can see in the pile, and we're about halfway there after 20 minutes with figuring where to unclip some plastic pieces from also...

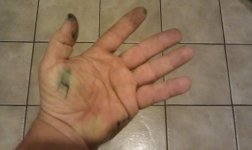
*Pro-tip* BE VERY CAREFUL: These electronics, like most, are make with sharp thin metal and will slice your fingers, arm and head off if you somehow manage to get it in there close enough!!!


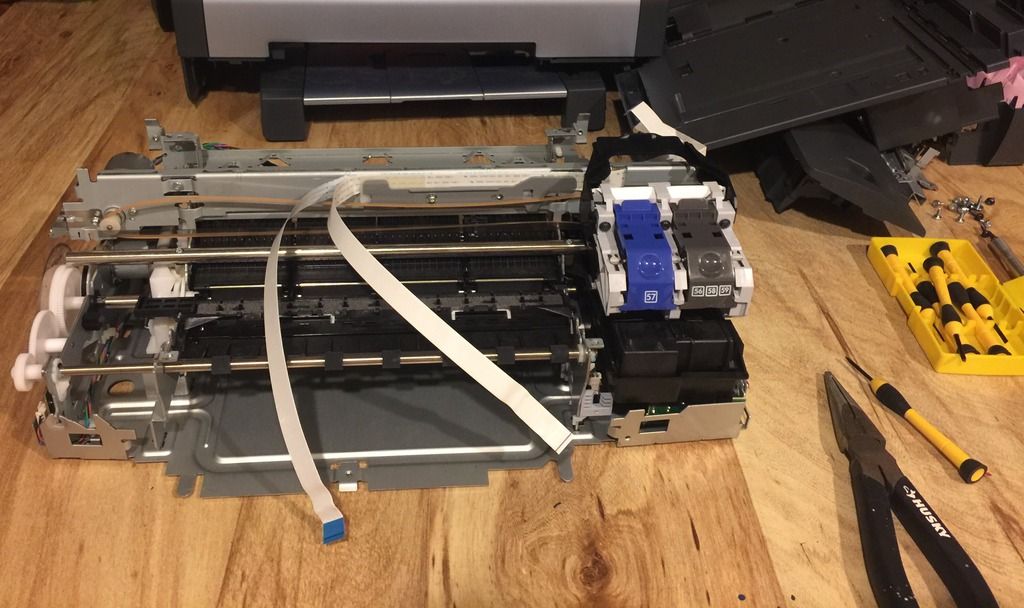
Ink cartridges out and no ink on the hands (bonus) because this was a new machine...


Now for the help I need....

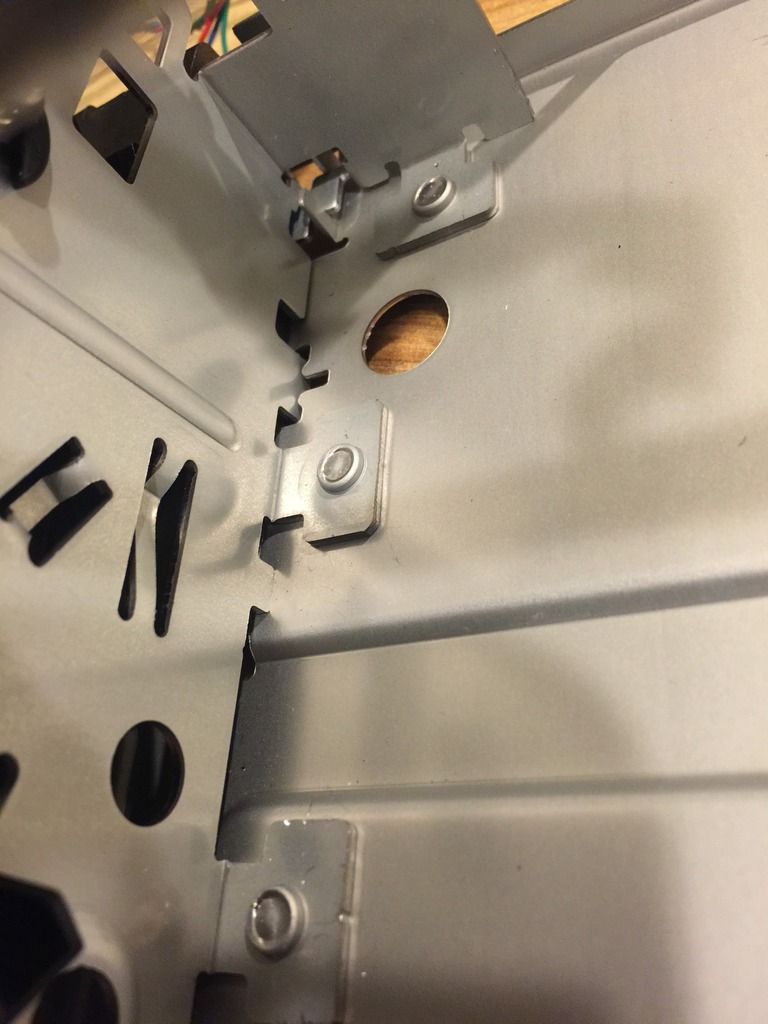
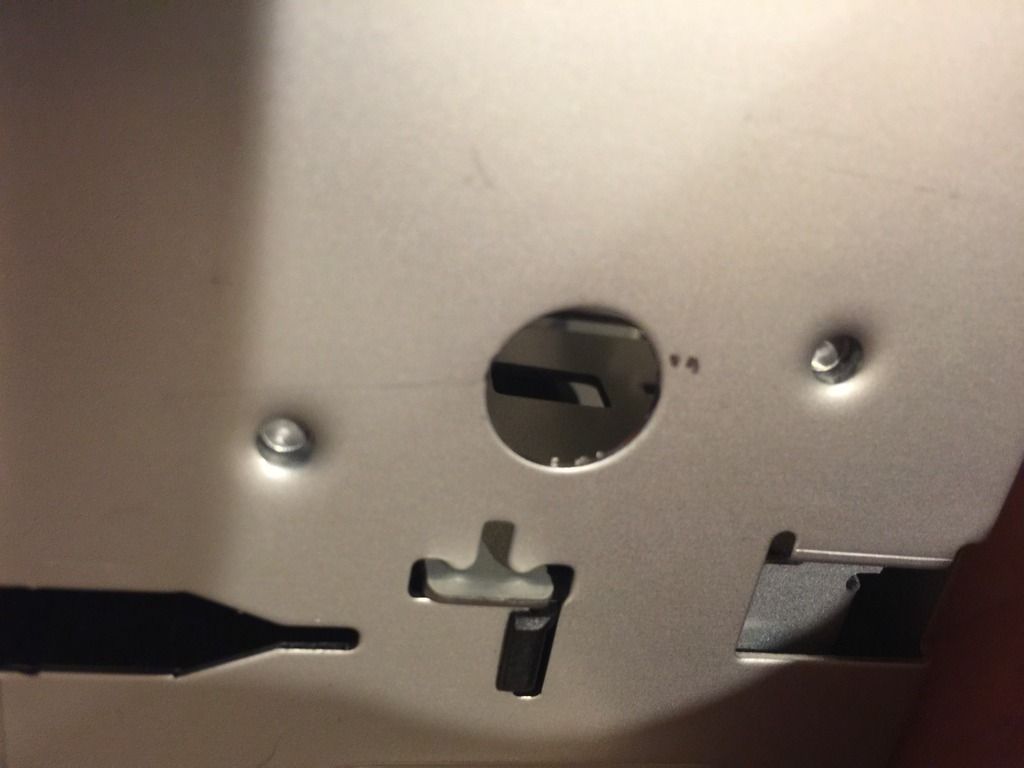
The sides holding the spindles look to be welded of sorts to the very bottom platform metal? I don't know what it's called but the best way I can think to describe it is like a rivet or button type weld or solder maybe? Take a look...


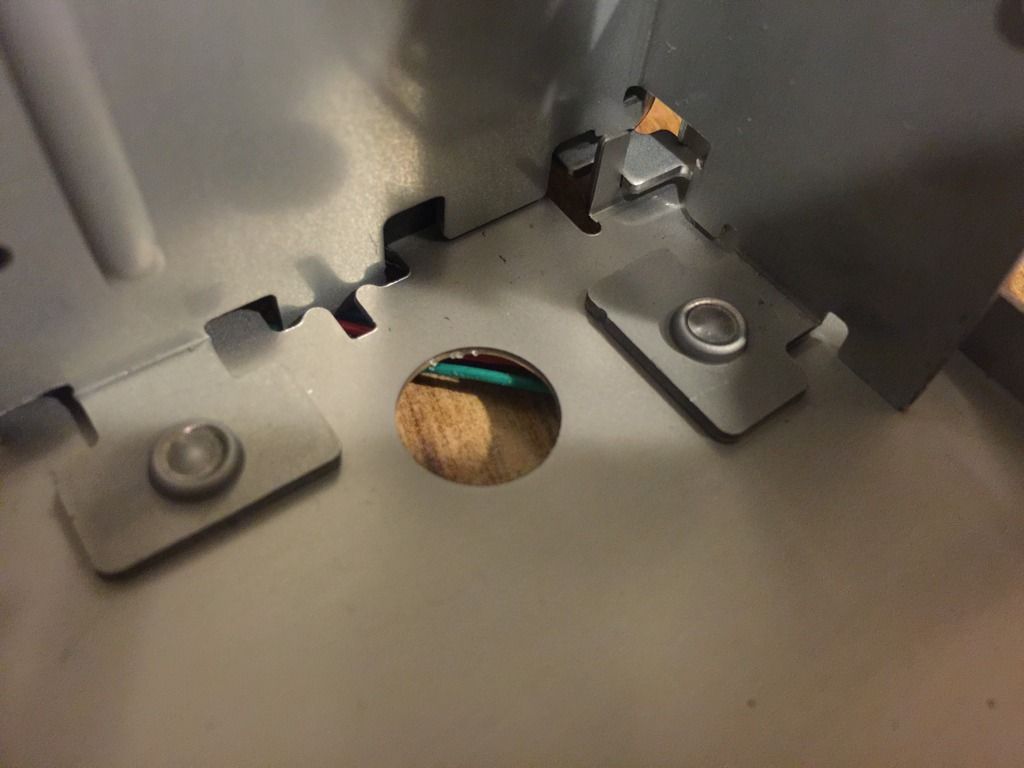
and the bottom side underneath...


I want to mount this on wood like the OP, so do these need to be drilled out with a small bit or does anyone know how to go about getting the sides undone from the base?

Or would it be better to just leave the sides attached to the base and run it like that? I was thinking if I could spread the rollers out a few inches, it might balance a tumbler jar better and less chance of it getting speed and flying off the rails.

Anyways, I hope this pictured disassembly helps someone and appreciate any advice you guys might have!!!
 
It looks like they used the metal from the lower piece and punched it through to use as a rivet basically. You should be able to drill the centers out I would think. The thing is if you move the rollers out, will you be able to keep the gears and or belt meshed for the motor? Looks like you about got it worked out. Good work!
 
It looks like they used the metal from the lower piece and punched it through to use as a rivet basically. You should be able to drill the centers out I would think. The thing is if you move the rollers out, will you be able to keep the gears and or belt meshed for the motor? Looks like you about got it worked out. Good work!

I think I will leave the sides attached to the base so the gears stay meshed properly. I stripped it down a little more bare and just have the one bar that is torxed in to remove, but I don't have that small of a torx to remove it now so I'll get it off tomorrow and screw the base down to wood bottom like you did.

Thank you for all the ideas and tips, Olds! Now I can just find a good tumbler like the one you got off Amazon and I'll be in business, and NO longer in the busyness of having to spend A LOT of time scrubbing coins!

Thanks a bunch, brother!!!! :cheers:

Final pics:


You need ANYTHING...Hit me up, bud!!!
 
Looks real good man. That nalgene bottle is working out really well. I cut a piece of thin stainless flat stock just long enough to pressure fit it along the edge from top to bottom to keep the coins from just sliding along the edge of the bottle. A squirt of gojo, a little water, a splash of vinegar and it's rock and roll time. Also make sure to separate your silver colored clad and your pennies. If not, the copper color from the pennies will discolor the other clad. Good luck and HH!
 

Attachments

  • tumbler.jpg
    tumbler.jpg
    26.4 KB · Views: 527
Looks real good man. That nalgene bottle is working out really well. I cut a piece of thin stainless flat stock just long enough to pressure fit it along the edge from top to bottom to keep the coins from just sliding along the edge of the bottle. A squirt of gojo, a little water, a splash of vinegar and it's rock and roll time. Also make sure to separate your silver colored clad and your pennies. If not, the copper color from the pennies will discolor the other clad. Good luck and HH!

Will do! Thanks for all your help again, you da' man!!! Happy Hunting to you as well, sir!
 
Awesome!

I wonder if any of you battlebot poindexters can figure out how to fab up a tumbler that will run off of 12v in the trunk of my car! That way, a guy could drive from site to site tumbling clad along the way, stop at the Coinstar on the way home, cash it in, buy some beer, and skip a whole lot of in house time!!

Dont say "Just pop off a wheel weight and put everything in a coffee can"...I tried that! :laughing:
Mud
 
Awesome!

I wonder if any of you poindexters can figure out how to fab up a tumbler that will run off of 12v in the trunk of my car! That way, a guy could drive from site to site tumbling clad along the way, stop at the Coinstar on the way home, and skip a whole lot of in house time!!
Mud

I got you covered Mud. I run mine off a 12V computer power supply. Just chuck your inkjet tumbler in the trunk and run some scrap copper wire back there! For that matter, you could loop the positive wire around the door handles on the way back and have a security system at the same time. :D
 
This thread is old but I wanted to comment on it for a couple of reasons. First off, the OP and others have done an awesome job on your tumblers! This is a great example of re-purposing and money saving. Plus good engineering...

I went to visit my friend Patrickcn (a member here and the one that had that car wreck, etc...), he has not been able to swing the MD and basically do much except go to PT and hang out in the house, so I though I would go over and mess with him. He has been very depressed so.... He had started a few projects before the accident but hasn't been able to work on them (too heavy and too physical for him right now) so I thought I would help him out. While out in the garage I noticed two old printers he had stacked on a shelf and remembered this thread.

I told him to look this thread up while I finished rehanging a door for him. He said he has seen this thread and was going to do it during the winter but now... So longer story shorter :laughing: I cleared a spot off on the workbench and set all printer down and got all his tools ready. He is going to start on it today (he removed the plastic housing and stopped after that last night). He can only work about 15 to 30 minutes at a time before the pain kicks in BUT at least now he has a purpose and something to work on. He actually smiled!

BUT ANYWAY:laughing::laughing: I wanted to thank the OP and others in this thread, this has given a good friend something to do now and its something he wanted to do. He has a couple of those plastic Folgers coffee containers (1 or 2 lbs) filled with clad and small items that need to be cleaned. Do you think those containers are too big? Should we use a smaller container?

Have a good day and thanks again!
 
Back
Top Bottom