Sunray Gold Pro headphone repair

Hound46

Senior Member
Joined
Nov 14, 2012
Messages
251
Location
Northwest Missouri
Hello. My headphones wire insulation is cracked where it enters the headphone entrance. I’m not getting any sound from the other side’s phone. Is this an easy fix? I’m not finding the sunray website printed on them as being active. Any guidance is appreciated.
Thank you.
 

Attachments

  • image.jpg
    image.jpg
    189 KB · Views: 24
I'm sorry, not much help, but there are many in here who would be glad to help you when they see this, best of luck with your phones.
too_
 
you can find these on fee-bay about new for 50.00
better than 150.00-175.00 new i use them on my 3030ctx
also did you make sure both switches are in the up position ?
 
Was it easy to take apart? You need a multimeter with the ohm scale to measure continuity. Check from the plug to end of each wire. That will tell you if there is an open and kinda where to start looking. Good luck.
 
  • Like
Reactions: CW3
Have you tested them on another metal detector? Might be an Etrac issue. The missing insulation on the Sun Rays doesn't really look enough to effect the workings to me. Do you own any other HPs to test/confirm it is the SR ones? Maybe plug the SRs into anything else to see if you lose the side muff.
 
Last edited:
Hello. My headphones wire insulation is cracked where it enters the headphone entrance. I’m not getting any sound from the other side’s phone. Is this an easy fix? I’m not finding the sunray website printed on them as being active. Any guidance is appreciated.
Thank you.

Hello. My headphones wire insulation is cracked where it enters the headphone entrance. I’m not getting any sound from the other side’s phone. Is this an easy fix? I’m not finding the sunray website printed on them as being active. Any guidance is appreciated.
Thank you.
 

Attachments

  • IMG_0013.png
    IMG_0013.png
    105 KB · Views: 22
Is this an easy fix?
Maybe, it depends on how handy you are with a soldering iron. Look at those tiny solder joints.You're gonna need a pencil tip iron, and some Solder-Wick to redo the joints. Solder-Wick will float the old solder out of the joint so you make all new connections. Some big ol' Weller soldering gun is gonna destroy the whole works. Don't even go there. Do you know how/can you do some very basic diagnostics with an ohm meter?
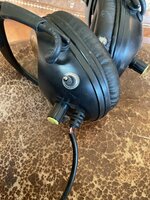
I was able to take them apart and repair the visible damage, but the far side muff is still silent.
Good, that's a start. What I would do is pull the jacket of the cable back into the strain relief and into the body of the muff, say 1-2 inches. Strip back the jacket and expose the wires. In some manner, (notate, picture) whatever, to make sure you know which color wire goes on which terminal.

Leave yourself a couple 1/16th of wire in the old solder joint and cut the wires. With the Solder-Wick and some small needle nose pliers or surgical forceps, clean up the old solder joint by heating and pulling the old wire out of the cup. Hopefully it will look like a cup when you're all done. There may still be a tad of solder in the cup, just leave it, it's fine... we'll reheat it later.

Now those wires hanging out in the breeze. Strip a few 1/16 of insulation, and tin the ends. With your ohm meter... hold one meter lead on the end of a tinned wire. The other meter lead will be held on the segments of the plug. (See how there's two very distinct segments on the plug?) From one of those two segments, to the end of your wire, you should get an indication of a complete circuit. On an old fashion analog meter, the pointer would swing fully to the right. On a modern digital meter, it will show all (0) zeros. (Think of the 0 as a loop or complete circuit). Repeat the same test for the other wire. If you failed to get complete circuits, the wire is damaged and you're gonna need to keep cutting back until you find intact wire. Places the wire is exposed to the most mechanical stress is where its usually broken (ie: at the base of plugs or strain reliefs)

Got good wire now... right? Good. Let's reconnect the wires back to their terminals. You want to put the tinned wire back in the cup. Heat the cup and you'll see the solder become molten. Insert the wire. Don't get the insulation of the wire in the joint. A good looking joint will have the wire insulation back away from the joint about the diameter of the wire. Reflow the joint as/if necessary with fresh solder. It should be bright and shiny. If it's dull/grey/ashy it is a poor, cold solder joint. Pull out the solder with Solder-Wick and start over. Repeat the process for all wires.

Check the new connections for continuity, and make sure there is no short circuits between terminals or the body of the headphones. Do the mechanical reassembly of the headphones.

See how easy that was? A lifetime ago; before my emergency services career, I was a MilSpec/Aerospace certified wirer/solder for RCA and yes, I went to school for electronics.
 
Thanks for everyone’s help. Looks like the first step will be checking functionality of the detector and the headphone function by pairing them up with known functioning pieces of equipment.
 
I posted the guy that fixes them… that was for Sunray( Ralph)… it was taken over by Joe Demarco… he had wireless Sunray headphones and a EX-1 probe coming out for the Equinox… He was showing people at a meet and had a massive heart attack… way to young…!
 
I use an Etrac too and have Sunrays also. I thought mine were going bad with a crackle as mine are stripped back just like yours. I bought Grey Ghosts and still had the problem. Looks like it was dirt/debris in the jack plug above the battery compartment. Compressed air did the trick. Give it a try.
 
I use an Etrac too and have Sunrays also. I thought mine were going bad with a crackle as mine are stripped back just like yours. I bought Grey Ghosts and still had the problem. Looks like it was dirt/debris in the jack plug above the battery compartment. Compressed air did the trick. Give it a try.
I’ll try this. Mine was crackling as you describe, too.
 
Back
Top Bottom