
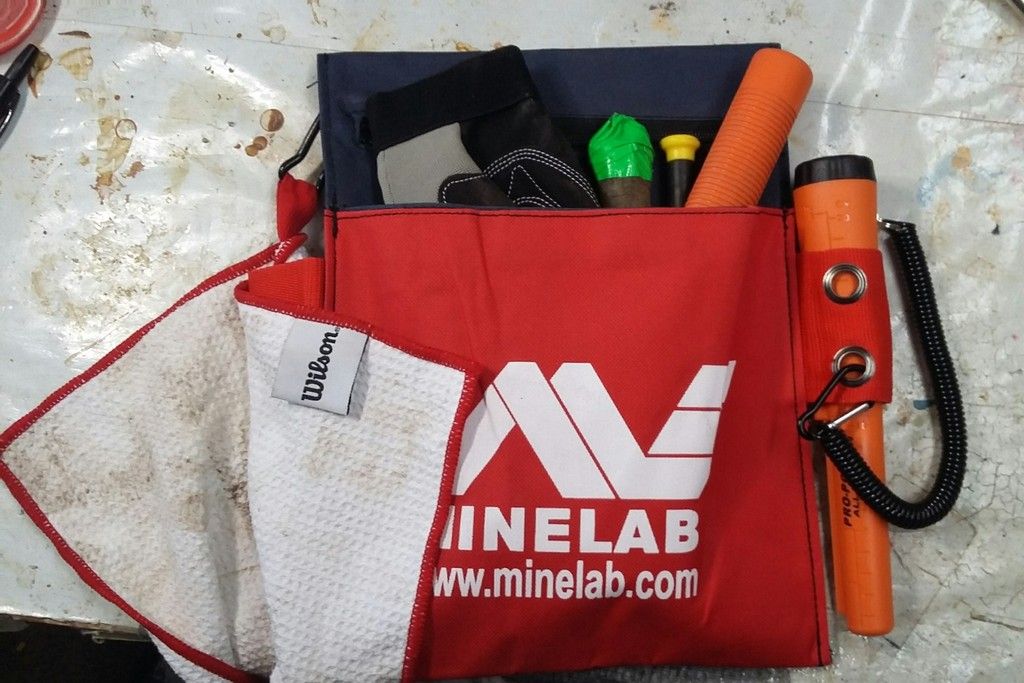
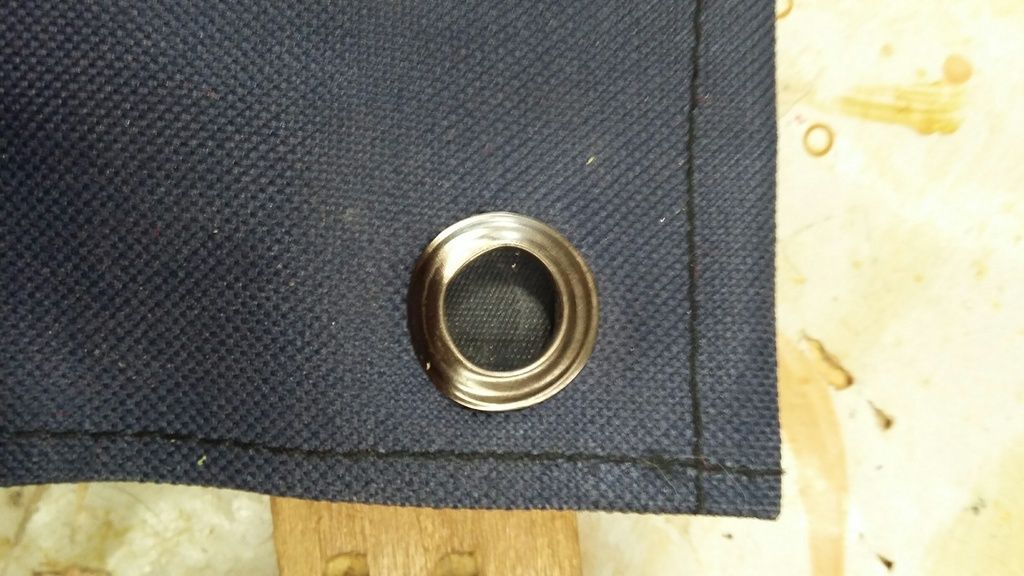
Hey guys! I recently got my X-terra 505 from KellyCo a couple weeks ago and they sent me all kinds of goodies. Among them was a Minelab pouch that I am using. Shortly after receiving my detector I ordered a Garrett pro-pointer and needed an anchor point for the lanyard. I decided the best route was eyelets. This was my first time using eyelets, but I decided to make a little DIY for anyone else who might want to do it to their gear! Eyelets are good for a few different things if you are creative enough. They can be used as anchor points, or even drain holes or what ever else you can think of. Ill start with the finished product first and then I'll explain the steps I took to make it happen, I hope you guys and gals enjoy.
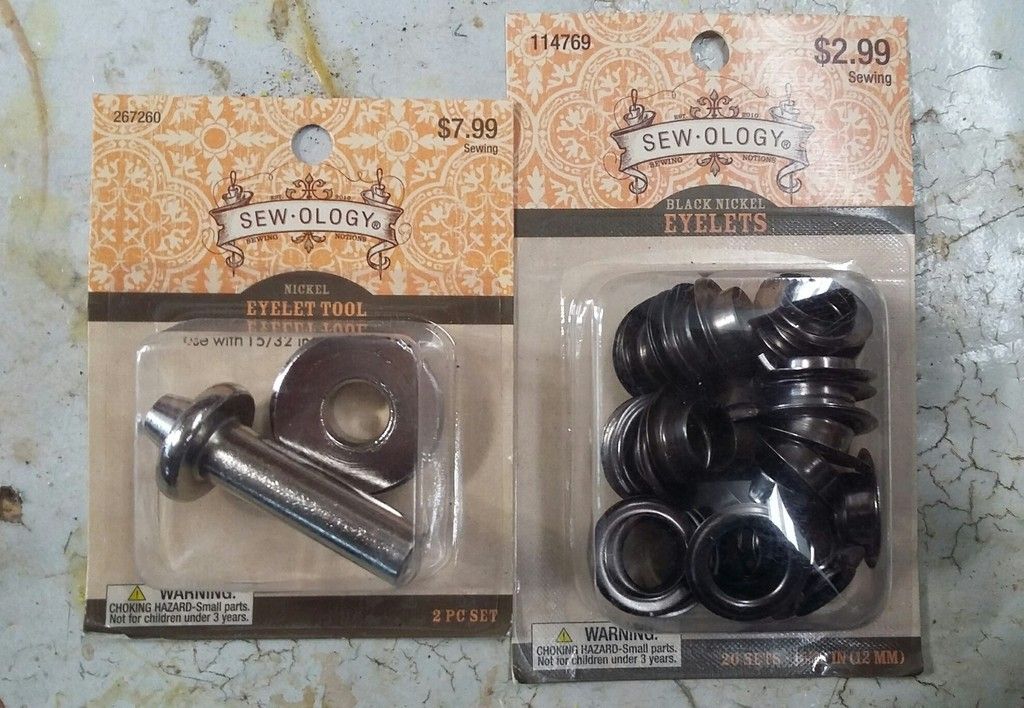
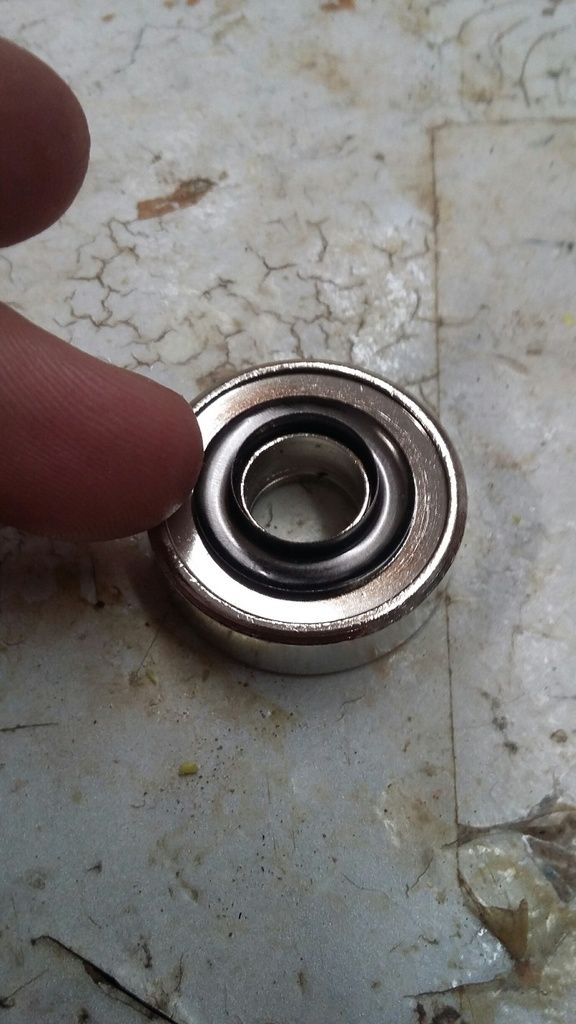
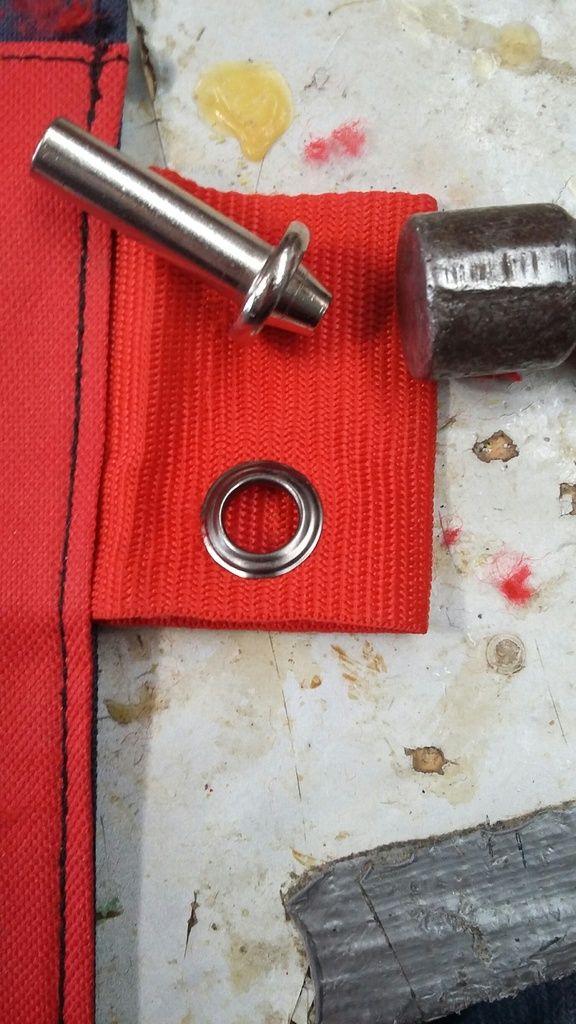
So what you will need is some Eyelets. They come in a multitude of sizes and colors. I chose 15/32 black nickel eyelets. I picked these up at my Local Hobby Lobby. Some of the eyelets come with the spreader tool and the anvil. If yours do not, you'll have to pick them up separately as I had to. Make sure the little spreader and the anvil are the right size for your eyelets.
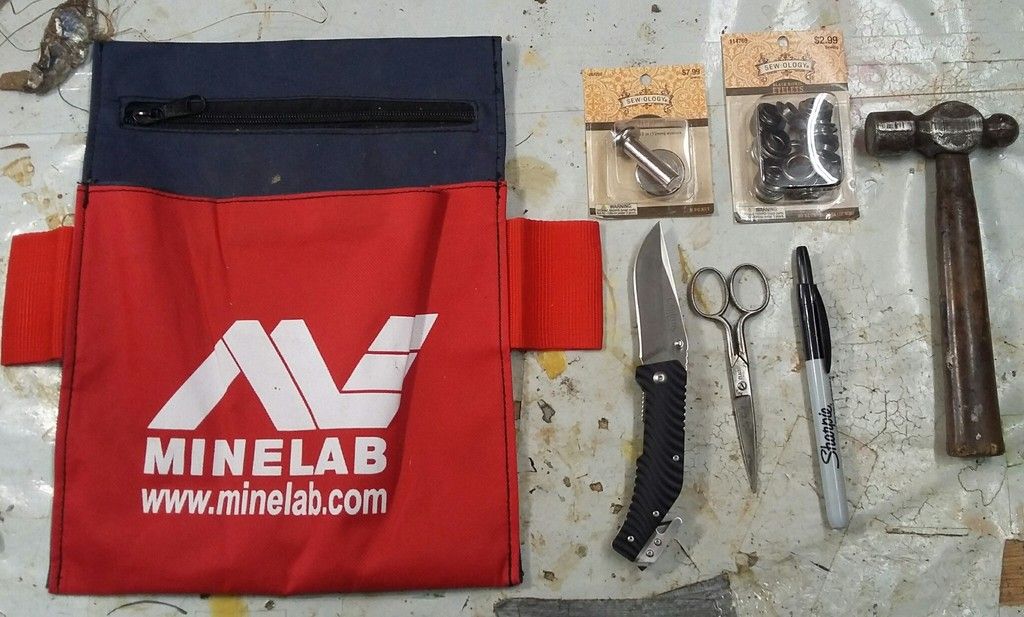
You will also need something to make a mark with, scissors or a knife to cut with, a hammer, your eyelets, the eyelet tools and of course your pouch or whatever you're adding eyelets to.
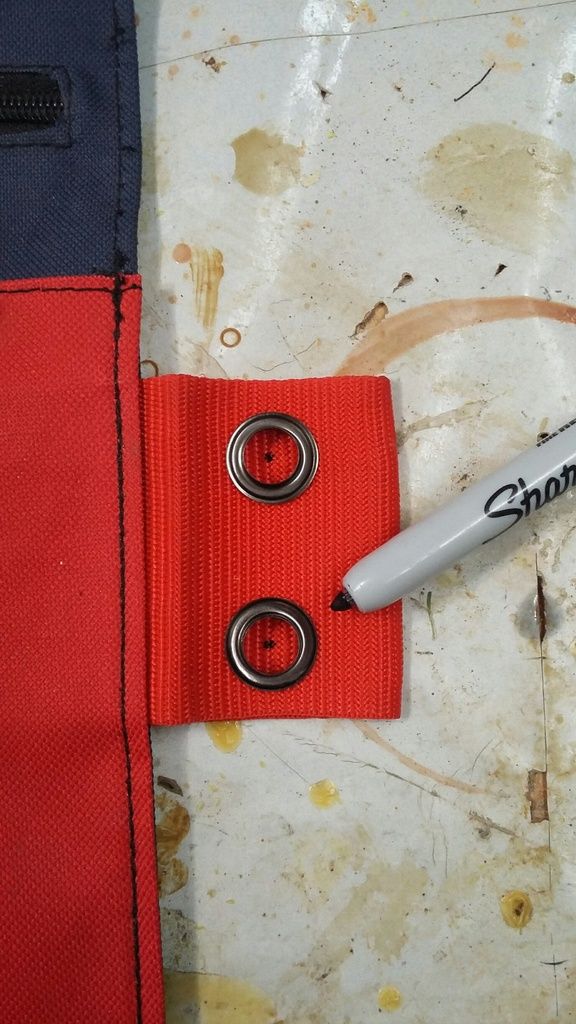
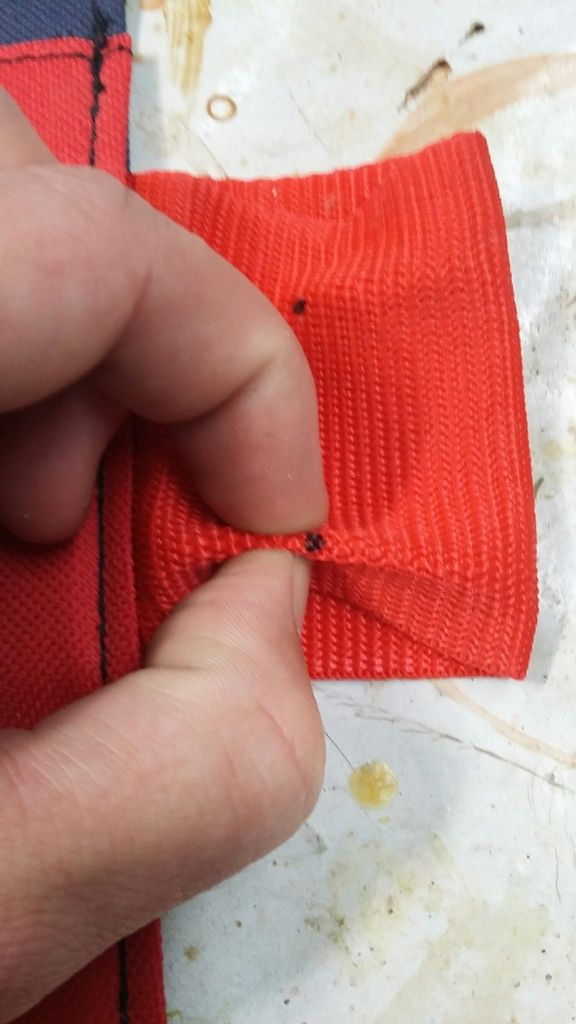
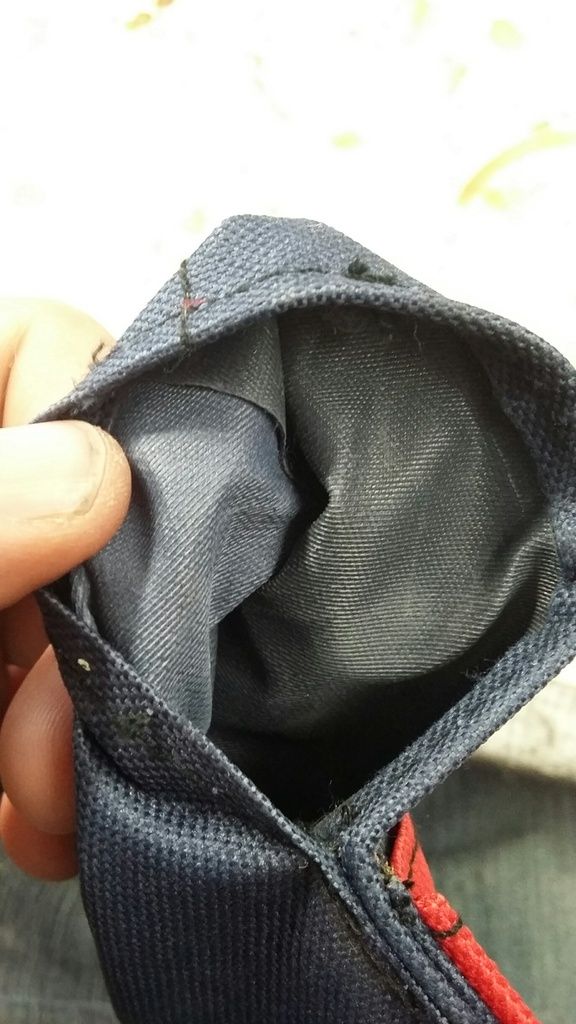
After you decide where to put your eyelets, you will need to mark where you need the hole. I used a sharpie and eyeballed where I wanted them. This can be as simple or as complicated as you want to make it. It wasn't a big deal to me if they lined up or not, so I just placed an eyelet and put a small dot where they were going.
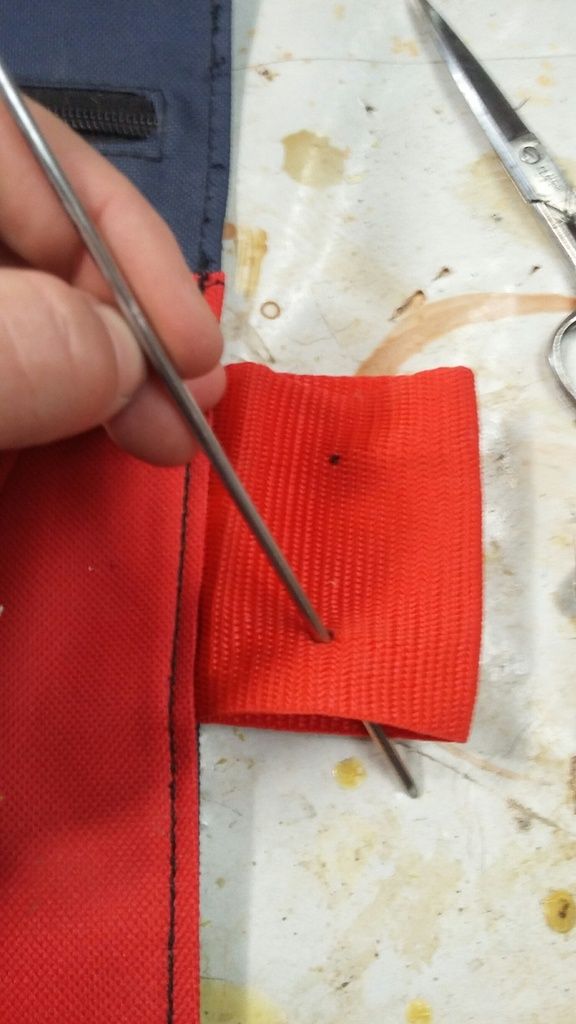
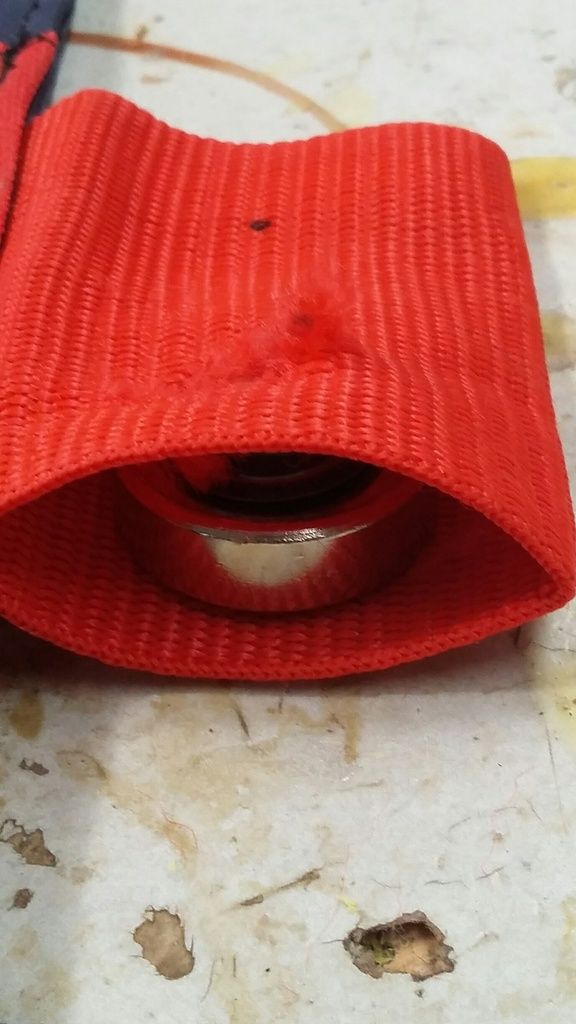
After you do that you want to start a hole and then make small little snips to allow the eyelet to slip through. Be mindful with this webbing type material as it likes to unravel as you work with it. So start small and just massage the eyelet through the hole until it is all the way through, without letting the hole get larger than the eyelet itself. I started a hole with my probe and then worked it more and more open with a knife and scissors.
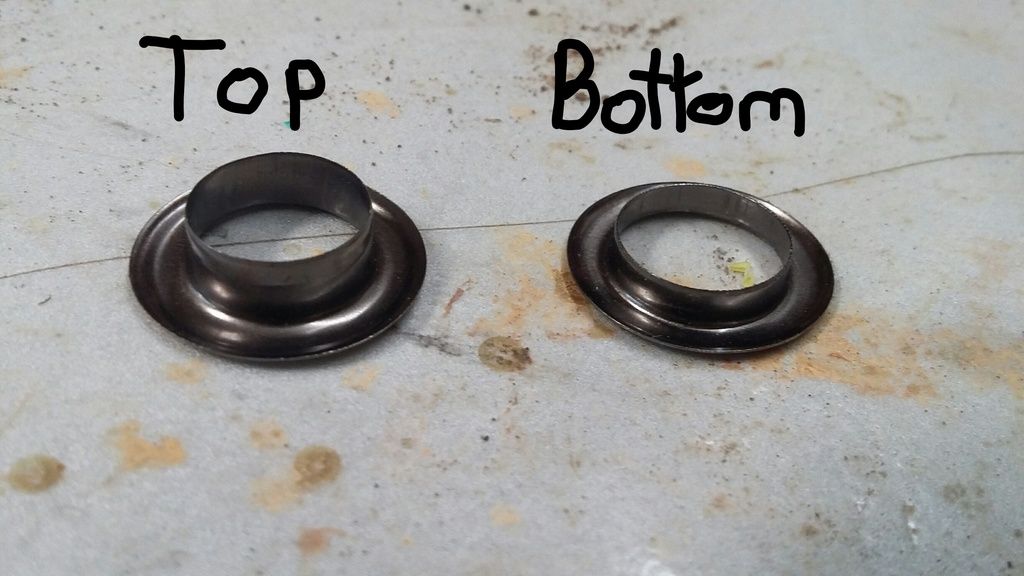
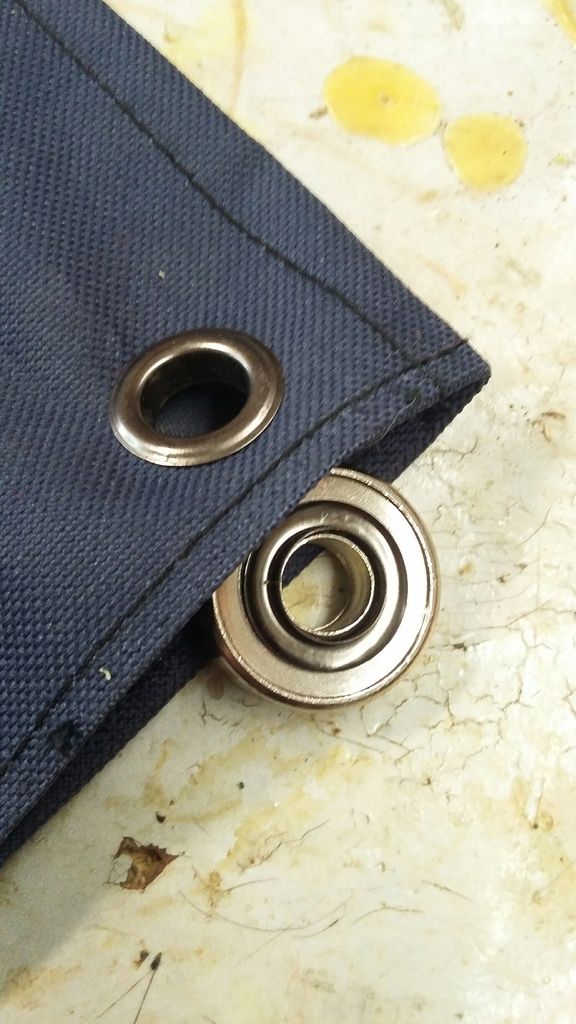
Now the Eyelets have a top and a bottom. The tops are the ones with the longer collar, the bottoms are the ones that have the smaller collar.
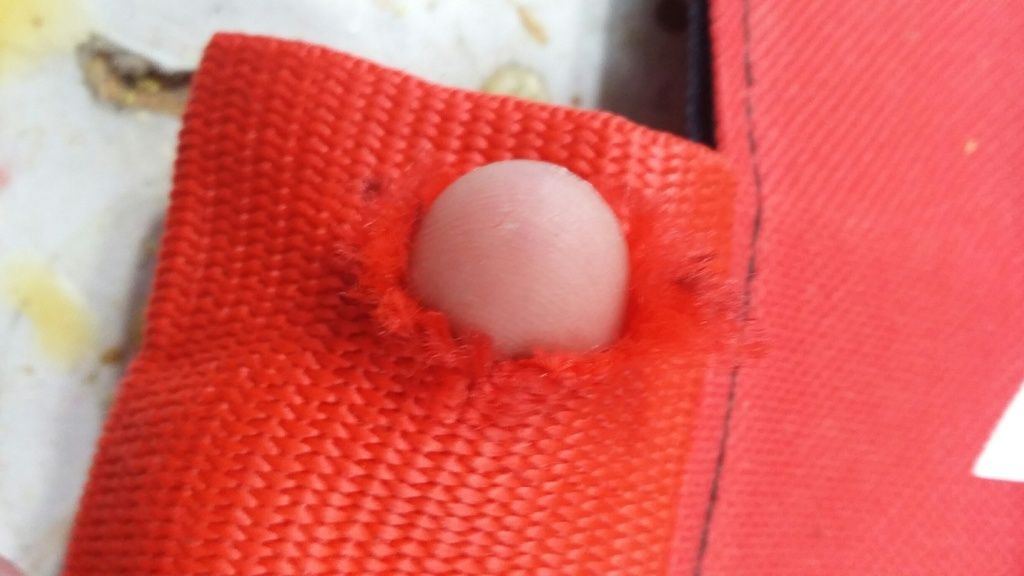
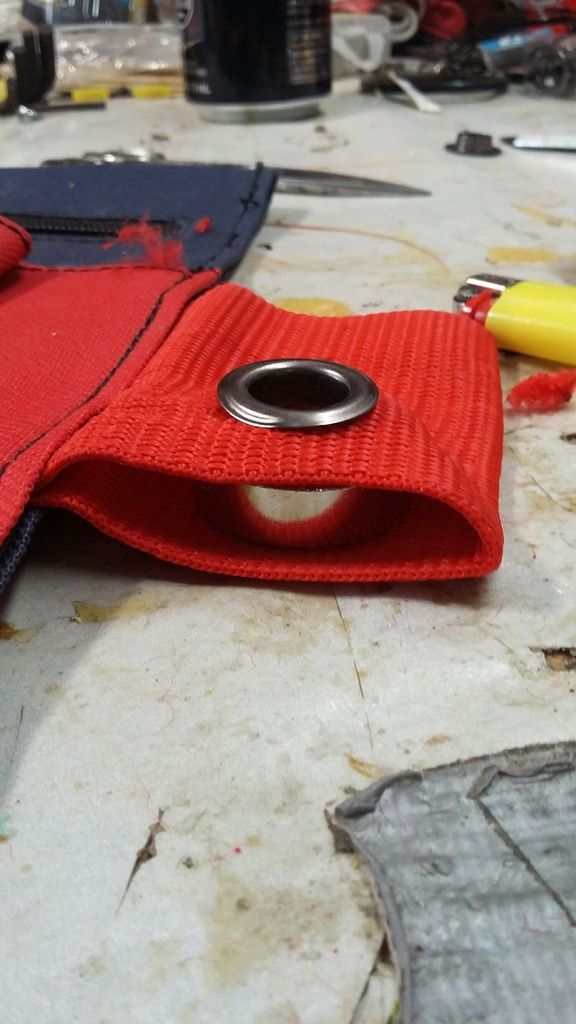
When you have your hole, and make sure the eyelet is fitting snugly in it without going through it, place the top through the hole. Place the bottom of the eyelet collar up on the anvil.
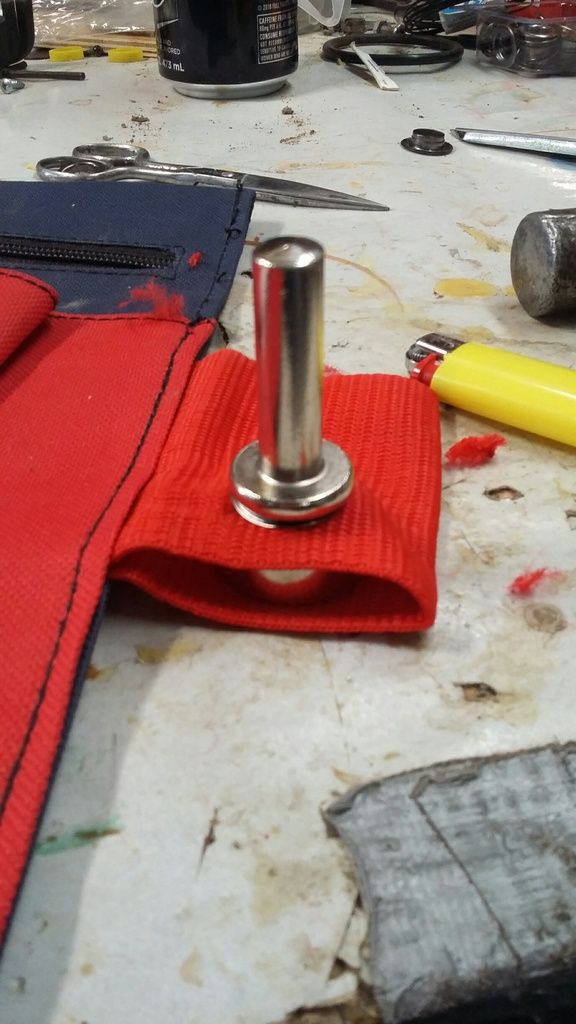
Now very carefully place your anvil with your bottom eyelet under the hole you made, with the top eyelet collar side down. Make sure they line up, place the spreader tool in and give it a couple healthy whacks with your hammer.
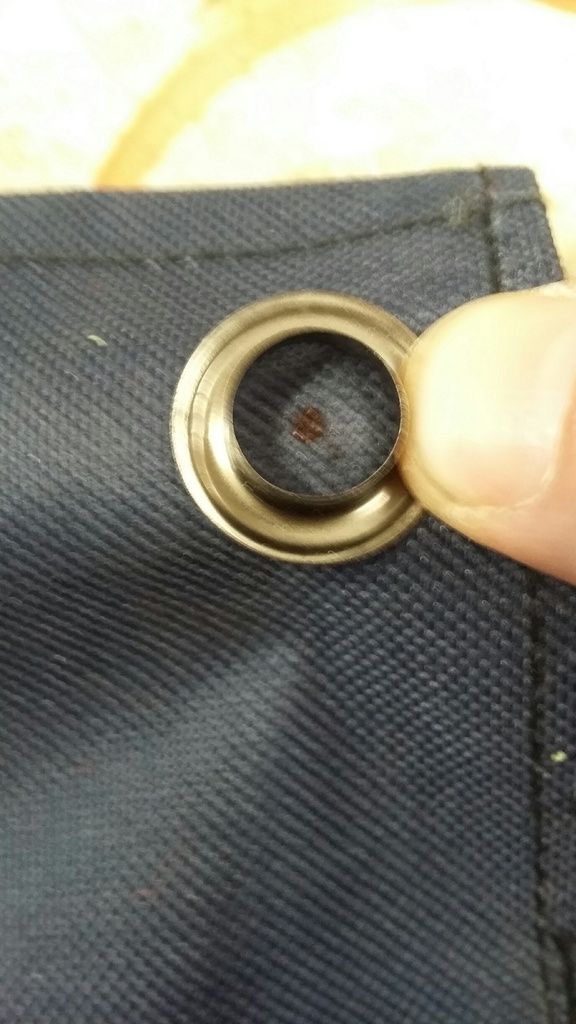
Now you're eyelet is good to go. I noticed with this webbing material after mine was done there were some frayed ends, so I just cleaned them up with a couple seconds of heat from a lighter.
There you have it! Pretty easy once you get the hang of it. Repeat the steps as necessary. I hope you enjoyed reading through this. If you have any comments or additions please feel free to comment. Again I hope you enjoyed and happy modding and hunting!
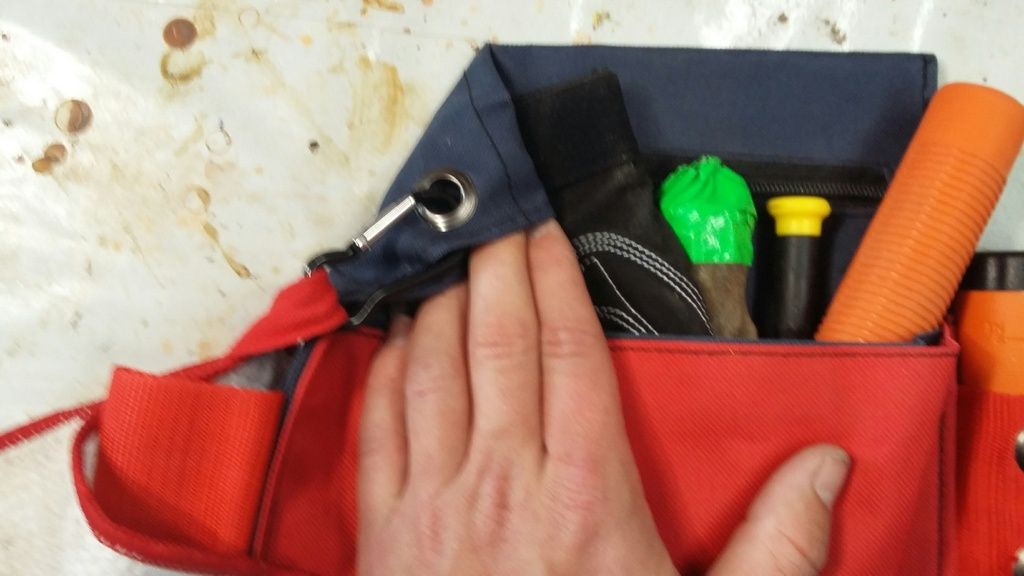
Bonus: After I was done I added an eyelet to the back of my pouch to save my belt loops from getting torn off with my towel. Here are the pictures from that.
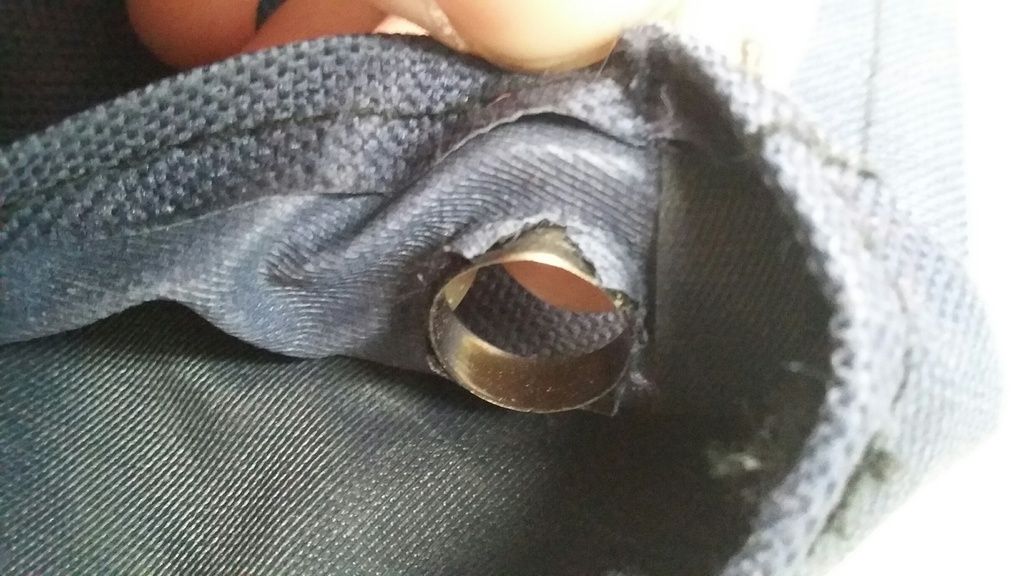
(sorry for the blurry picture)

So what you will need is some Eyelets. They come in a multitude of sizes and colors. I chose 15/32 black nickel eyelets. I picked these up at my Local Hobby Lobby. Some of the eyelets come with the spreader tool and the anvil. If yours do not, you'll have to pick them up separately as I had to. Make sure the little spreader and the anvil are the right size for your eyelets.

You will also need something to make a mark with, scissors or a knife to cut with, a hammer, your eyelets, the eyelet tools and of course your pouch or whatever you're adding eyelets to.

After you decide where to put your eyelets, you will need to mark where you need the hole. I used a sharpie and eyeballed where I wanted them. This can be as simple or as complicated as you want to make it. It wasn't a big deal to me if they lined up or not, so I just placed an eyelet and put a small dot where they were going.

After you do that you want to start a hole and then make small little snips to allow the eyelet to slip through. Be mindful with this webbing type material as it likes to unravel as you work with it. So start small and just massage the eyelet through the hole until it is all the way through, without letting the hole get larger than the eyelet itself. I started a hole with my probe and then worked it more and more open with a knife and scissors.


Now the Eyelets have a top and a bottom. The tops are the ones with the longer collar, the bottoms are the ones that have the smaller collar.

When you have your hole, and make sure the eyelet is fitting snugly in it without going through it, place the top through the hole. Place the bottom of the eyelet collar up on the anvil.

Now very carefully place your anvil with your bottom eyelet under the hole you made, with the top eyelet collar side down. Make sure they line up, place the spreader tool in and give it a couple healthy whacks with your hammer.


Now you're eyelet is good to go. I noticed with this webbing material after mine was done there were some frayed ends, so I just cleaned them up with a couple seconds of heat from a lighter.

There you have it! Pretty easy once you get the hang of it. Repeat the steps as necessary. I hope you enjoyed reading through this. If you have any comments or additions please feel free to comment. Again I hope you enjoyed and happy modding and hunting!
Bonus: After I was done I added an eyelet to the back of my pouch to save my belt loops from getting torn off with my towel. Here are the pictures from that.


(sorry for the blurry picture)