ToddB64
Elite Member
Dear friends,
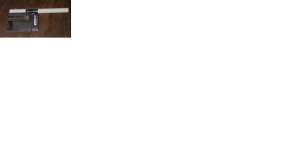
Here are pics of my home made pinpointer, etc..
I used the instructions by Dan Clark on www.tomstreasures.com website.
The lower pic in the first set shows the cover off of the electronics box and the two nylon bolts I used to fasten the tube to the box. I also applied glue, but the bolts insured a good mechanical connection.
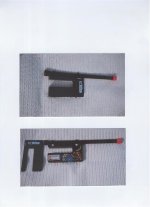
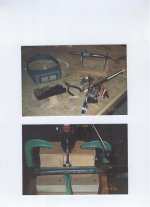
The top pic in the second set shows my setup for soldering the wires from the coils to the electronics board. For this work I used a pencil-tip, low watt soldering iron and a handy little gadget called "Helping Magnifier", which has the two swivel-arm alligator clips for holding things steady. In addition, a pair of head mounted magnifier glasses, which I had bought years ago for other work, really made the job easier for me at age 66") .
.
The bottom pic in the second set shows the setup on my bench drill press, for drilling out the end of the tube large enough for the ferrite rod and coil wires. The fixture I made has wooden sliding jaws, which are notched for two apposing steel vee blocks, for holding the plastic tube secure. A large C-clamp was used to tighten the sliding blocks. Finally, a Forstner bit was used for drilling a cobore in the end of the tube, providing a smooth cut and a flat-bottomed hole. This all worked great, allowing me to keep the cobore centered and the resulting tube wall thickness even all the way around.
Granted, I already had most of the equipment & tools on hand for this project, so was ahead of the game in this respect and only had to buy the following items:
#1) Radio Shack pencil-tipped soldering iron #64-2051, 15 Watt, @ $8.53
#2) Helping Magnifier #00319, purchased at Harbor Freight, @ $2.99
#3) Gardner Bender GPD-902 "In-wall Pipe & Wall Detector", ordered from a local electrical supply house, @ $17.65 (tax included).
Final comments on the project: Other than the soldering operations, which put some strain on my nerves, the construction and finished project were satisfying. However, I was not happy with the lack of control using the thumb wheel sensitivity adjustment. Here's the scenario; you roll the thumb wheel back a smidgen until you hear a "click" and the unit comes on, gives an audible tone and a red light comes on. Next, you continue rolling the wheel backward until the tone and light go off. Now, here's the rub for me. I personally like to have the sensitivity set (determined by how far you roll the wheel backward once the tone and light go off.) for approx. 1-1/2" depth. To achieve this kind of max. depth with this unit, the wheel must be stopped on the backward roll at the exact spot where the tone and light go off and no further. If you roll the wheel any more, sensitivity and depth drop off very quickly to 1/2" depth or less. This is just too shallow for my needs, since the Ace250 doesn't pinpoint that accurately, at least for me it doesn't. So that's why I decided to go for a professionally made pinpointer.
After investigating (9) different commercial pinpointers, ranging in price from about $35.00 up to my personal limit of $175.00, I just recently ordered the Vibra Probe 570 from Tony @ $129.95 and delivery is expected sometime in early October, 2007 from the manufacturer to the dealers.
I apologize for the length of this post, but for anyone thinking of building their own pinpointer to the Dan Clark instructions, I hope you got something helpful out of this.
HH !.........Todd
Here are pics of my home made pinpointer, etc..
I used the instructions by Dan Clark on www.tomstreasures.com website.
The lower pic in the first set shows the cover off of the electronics box and the two nylon bolts I used to fasten the tube to the box. I also applied glue, but the bolts insured a good mechanical connection.
The top pic in the second set shows my setup for soldering the wires from the coils to the electronics board. For this work I used a pencil-tip, low watt soldering iron and a handy little gadget called "Helping Magnifier", which has the two swivel-arm alligator clips for holding things steady. In addition, a pair of head mounted magnifier glasses, which I had bought years ago for other work, really made the job easier for me at age 66
. The bottom pic in the second set shows the setup on my bench drill press, for drilling out the end of the tube large enough for the ferrite rod and coil wires. The fixture I made has wooden sliding jaws, which are notched for two apposing steel vee blocks, for holding the plastic tube secure. A large C-clamp was used to tighten the sliding blocks. Finally, a Forstner bit was used for drilling a cobore in the end of the tube, providing a smooth cut and a flat-bottomed hole. This all worked great, allowing me to keep the cobore centered and the resulting tube wall thickness even all the way around.
Granted, I already had most of the equipment & tools on hand for this project, so was ahead of the game in this respect and only had to buy the following items:
#1) Radio Shack pencil-tipped soldering iron #64-2051, 15 Watt, @ $8.53
#2) Helping Magnifier #00319, purchased at Harbor Freight, @ $2.99
#3) Gardner Bender GPD-902 "In-wall Pipe & Wall Detector", ordered from a local electrical supply house, @ $17.65 (tax included).
Final comments on the project: Other than the soldering operations, which put some strain on my nerves, the construction and finished project were satisfying. However, I was not happy with the lack of control using the thumb wheel sensitivity adjustment. Here's the scenario; you roll the thumb wheel back a smidgen until you hear a "click" and the unit comes on, gives an audible tone and a red light comes on. Next, you continue rolling the wheel backward until the tone and light go off. Now, here's the rub for me. I personally like to have the sensitivity set (determined by how far you roll the wheel backward once the tone and light go off.) for approx. 1-1/2" depth. To achieve this kind of max. depth with this unit, the wheel must be stopped on the backward roll at the exact spot where the tone and light go off and no further. If you roll the wheel any more, sensitivity and depth drop off very quickly to 1/2" depth or less. This is just too shallow for my needs, since the Ace250 doesn't pinpoint that accurately, at least for me it doesn't. So that's why I decided to go for a professionally made pinpointer.
After investigating (9) different commercial pinpointers, ranging in price from about $35.00 up to my personal limit of $175.00, I just recently ordered the Vibra Probe 570 from Tony @ $129.95 and delivery is expected sometime in early October, 2007 from the manufacturer to the dealers.
I apologize for the length of this post, but for anyone thinking of building their own pinpointer to the Dan Clark instructions, I hope you got something helpful out of this.
HH !.........Todd
Attachments
Last edited: