Mr. Bill's mod. & what I learned

SkiWhiz

Elite Member
Joined
Mar 26, 2006
Messages
8,601
Location
upstate New York
I recently purchased a White's Classic II as I got it for a good price and because I have always wanted to do the Mr. Bill's mod. I added the ground balance and threshold potentiometers a few weeks ago and finally received the resistors (51 ohm & 2.2 Meg. ohm) in the mail the other day and installed them this morning. I have read up on Mr. Bill's mod. many times and always wondered what he did to tweak the detector. What I discovered is that by adding the resistors (the 51 ohm & the 2.2 Meg. ohm) seems to be the tweak. All the White's Classics that I have ever owned were completely quiet with sensitivity at max. Now after the resistor change the detector can not have the sensitivity at max. without chirping. It acts like the Tesoro's when turned in the red. I did notice an increase in air tests inside my home but how much difference it will make in actual in ground use will have to wait until the ground thaws and the snow melts. My guess is that doing the mod. is going to be worth my time & effort.

P.S. I have extra pots. & resistors left if anyone wants the mod. done, I would be happy to do it.
 
Hello Ski Whiz,
I was lucky enough to find a Classic III and would like to try Mr Bills Mod, though I have not yet located the plans or parts list. any hints on where I might be able to locate such a creature?

Thanks, Dave

Whites Classic III & PRIZM IV
 
Hello Ski Whiz,
I was lucky enough to find a Classic III and would like to try Mr Bills Mod, though I have not yet located the plans or parts list. any hints on where I might be able to locate such a creature?

Thanks, Dave

Whites Classic III & PRIZM IV

Just did this last week on a Coinmaster Classic III, and I am also adding a pinpoint button to just in front of the hand hold so you can hit it with your thumb. This will allow the box to be mounted under the arm cuff which is really sweet to swing. I will post a new thread in the DIY from when complete in a day or so.

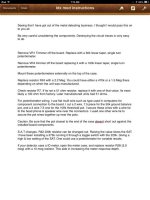
Here are the instructions, you will need to know how to desolder part from a PC board, drill holes for mounting pots and of course solder new components on the pc board.

Mrbiilsmods.jpg
 
Classic III plus - like new with Mr. Bill's mods - in the classifieds for sale

I just posted a pristine one for sale in the classifieds
 
Just did this last week on a Coinmaster Classic III, and I am also adding a pinpoint button to just in front of the hand hold so you can hit it with your thumb. This will allow the box to be mounted under the arm cuff which is really sweet to swing. I will post a new thread in the DIY from when complete in a day or so.

Here are the instructions, you will need to know how to desolder part from a PC board, drill holes for mounting pots and of course solder new components on the pc board.

Mrbiilsmods.jpg
Thanks for the Quick turnaround. I have taken this and ordered the parts to do this mod. Once they come in, I will give it a shot & let y'all know how it goes.

Dave
_________________________________________
'03 Classic III (Soon to be Modded) & '08 PRIZM IV
 
Make sure you have desoldering braid as the resistors are well attached, the solder flowed all the way through the board. Heat the pad and add a little fresh solder so the flux flows, then put the braid on and heat and it should suck the hole clean. The touch of new solder is the trick.. without it the old solder won't flow. Guess you could add flux without solder but that can get messy..
Good luck, I will be listing mine for sale shortly, I did not cut my teeth on these old units and just don't have the appreciation for "Low and Sloooow"
 
I know this is an old thread but does anyone have the plans for this mod? The links posted are not working.

Any idea where I can get them?

Cliff
 
Here you go Cliff -

Mr. Bill's mods.

Remove VR1 Trimmer off the board. Replace with a 50k linear taper, single turn potentiometer.

Remove VR4 trimmer off the board replacing it with a 100k linear taper, single turn potentiometer.

Mount these potentiometer’s externally on the top of the case.

Replace resistor R24 with a 2.2 Meg. You could have either a 470k or a 1.5 Meg there depending on when the unit was manufactured.

Check resistor R7. If it’s not a 51 ohm resistor, replace it with one of that value. It’s most likely a 100 ohm from factory. Later manufactured units had 51 ohms.

For potentiometer wiring, I use flat multi wire such as type used in computers for component connection to the board. I cut a 2 wire, 7.5” piece for the 50k ground balance pot, and a 3 wire 7.5” one for the 100k threshold pot. I secure these wires with a wire tie to the head phone & speaker wire near the connectors. I used one other wire tie to secure the pot wires together up near the pots.

Caution. Be sure that the pot closest to the end of the case doesn’t short out against the installed board components.

S.A.T changes. R32 220k resistor can be changed out. Raising the value slows the SAT. I have been installing a 375k running it through a toggle switch with the 220k. Giving a high & low setting of the SAT. One could use a potentiometer for variable results.

If your detector uses a ID meter, open the meter case, and replace resistor R28 (3.9 meg) with a 10 meg resistor. This aids in increasing the meter response.
 
Back
Top Bottom